Bird Photography - Create impressive images
Photographing birds can be very difficult. Many species are very shy and are therefore often rather far away. In addition, most birds are quite small. With the right equipment, the right settings and the right technique, the whole thing becomes a little easier. In this article you will learn how to create impressive and unique pictures of birds. I explain what you should pay attention to when taking pictures and where you can find birds that you can easily photograph. Learn from my tips and tricks, that I have learned in the last few years while photographing birds.
1. Bird photography - Equipment
1.1 The right camera
On today's camera market, you can find good cameras for a very low price. Although the image quality increases even more with a higher price, the differences become smaller and smaller. But which camera is best suited for bird photography?
There is no clear answer to this question. Nevertheless, there are some factors you should consider when choosing a camera. Compared to other photography specialisations, bird photography is very dependent on the gear.
Besides a fast autofocus, many bird or animal photographers prefer cameras with a high resolution. This allows them to crop the image a little bit if necessary. If you decide to use a camera in DX or APS-C format instead of a full format camera, you have a crop right from the start. If this is the case, the camera doesn’t have to have as many megapixels.
Beside the autofocus and the resolution, the noise patterns at high ISO values also play an important role. Certain bird species only come out at dusk. To photograph these birds - or generally in low light conditions - you have to increase the ISO considerably. High ISO-values introduce noise to the image. Cameras with lower resolutions and therefore larger pixels, and cameras with better algorithms tend to have less noisy images.
So when choosing a camera, a certain compromise must always be made. The choice of camera manufacturer can also be very difficult. Whether Nikon, Canon or Sony: they all offer good cameras and in the end it depends more on how much money you want to invest in a camera.
1.2 The right lens
Especially for bird photography the lens is almost more important than the camera. Since most birds are rather shy, a telephoto lens is a must. For bird photography the rule is in most cases: the bigger the lens the better. Larger lenses not only have a high magnification but are also very sharp, have a fast aperture and auto focus.
Especially second-hand lenses can be found at a relatively low price. For example, the Sigma 150-600mm 5.0/6.3 which I own myself. It’s not necessarily the fastest lens with a maximum aperture of 6.3 at 600mm, but with 600mm it has the optimal focal length for bird photography. However, the AF motor is also on the slower side. Still, it is a great lens for the price. For an upgrade concerning the autofocus and the speed, you can easily pay a few thousand francs more. Though those sharper and faster lenses are also heavier and bulkier.
1.3 Tripod
Whether you should use a tripod depends on both the situation and your own preferences. For example, I use the tripod mainly when I stay for a longer time period in one place and wait for a bird. But when I am walking and actively looking for birds, I leave my tripod at home.
On those occasions, the tripod restricts me too much and is usually only in my way. Depending on the location, I am not flexible enough with the tripod to get on eye level with the bird or to get the desired background. Sneaking up on a bird is also much more difficult with a tripod. If I take pictures without my tripod, I have to increase the shutter speed a little bit to avoid blurred pictures. But especially with a good image stabilizer in the lens this is not so difficult anymore.
1.4 Accessories for bird photography
Especially for very shy birds a photo hide or a camouflage net is very useful. Personally, I only rarely use camouflage. I rather try to find individuals who are not so shy and get used to my presence. Depending on the species this is hardly possible and then a camouflage tent or something similar can help. But it is up to you to decide, if you really need a photo hide.
What is often underestimated in bird photography are the clothes. If you have warm gloves, you can stand 20 minutes longer at the location in winter. If your rain jacket is waterproof, you stay outside in the rain 30 minutes longer. If you have a good backpack, you can carry the heavy camera around for a kilometre. These few minutes more might be enough for the shy bird to suddenly show up after all. On the kilometre that you walk more, you might see a rare bird.
2. The right settings for bird photography
A beautiful bird in wonderful light or with a unique behaviour is worth nothing if the photo is too noisy, out of focus or blurred. In order not to miss a great photo, you should not leave your camera settings to chance (automatic mode). Instead you should set the settings yourself. For this it is important that you are familiar with the values and know how to adjust them.
2.1 Settings
Aperture
The aperture controls how much light falls on the sensor. The aperture also controls the depth of field and the bokeh. To make the bird stand out from the background, the background should be as blurred as possible. This is enhanced by an open aperture. With a small f-number such as f/ 4. the aperture is opened widely and thus the background is out of focus. On the other hand, with an aperture of f/ 11 I get a much sharper background. Since I usually shoot with a completely open aperture, I only have to worry about the other settings.
Exposure time
Various factors flow into the selection of my exposure time. Does the bird sit, run or fly? Do I have my camera on a tripod? What kind of lighting conditions do I have? What is my ISO value?
With a fast shutter speed, I can freeze fast movements, but I need more light or a higher ISO value. With a longer exposure time, I need a lower sensor sensitivity and therefore get an image with less noise. However, I run the risk of getting motion blur in my pictures because either the camera or the bird has moved.
ISO-sensitivity
How the ISO in digital cameras really works is very complicated. In very simplified version, however, the ISO value works in such a way that it determines the light sensitivity of the sensor. The lower the value, the less light sensitive the sensor becomes. The other way round, with a high ISO value, the sensor needs less light to produce an equally bright image. Due to the higher sensitivity of the sensor, the image becomes noisy and loses its sharpness.
Exposure compensation
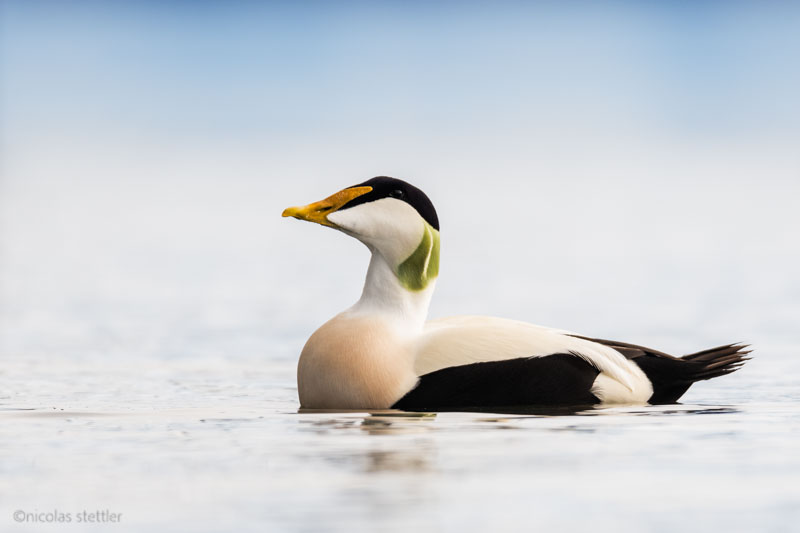
In order for the camera to select the correct ISO value, I use exposure compensation. With this, the camera can be informed whether it should over- or underexpose the picture. For example, a photo of a bright bird in front of a dark background has to be underexposed. Otherwise the camera would expose in such a way that the background would be correctly exposed. Parts of the bright plumage of the bird would "burn out". This means that these bright areas would no longer contain any color data and would be displayed as completely white pixels.
Birds, which have a very high contrast plumage, are especially difficult to expose. Eider ducks, for example, have such a strong plumage contrast that either the light or the dark plumage parts are over- or under-exposed. The histogram can help you to see whether both the light and dark areas still contain information. To avoid burning out the highlights and the shadows, you should avoid values on the far left and right of the histogram.
2.2 Camera mode
The camera mode determines how the shutter speed, aperture and ISO sensitivity are set. This is either done automatically, semi-automatically (by setting only certain settings) or completely manually.
For bird photography I can only recommend the manual mode. But you can adjust this mode so that not all values really have to be set manually. Though the word ‘manual’ does not really fit anymore.
Manual with ISO-Auto
In this mode, you set the exposure time and aperture yourself, while the camera sets the correct ISO value. While I set the focus with the exposure time and the depth of field or bokeh with the aperture, the camera calculates the ISO value so that the image has the correct brightness. You can set a maximum for the ISO. The camera won’t exceed this value, which prevents it from selecting unusable ISO values. I recommend you select the maximum value yourself as every camera performs different.
Manual ISO
Instead of using exposure compensation, you can also set the ISO value yourself. There is not really a big difference between the two methods. I myself shoot with ISO auto and exposure compensation. For me this works better than setting the ISO manually. What works better for you, you can only find out by trying.
How to find the right settings for photographing birds
As I mentioned before, I would use an open aperture if possible when photographing birds. This way you only have to care about the exposure time and either the exposure compensation or the ISO value.
The basic rule of thumb for the exposure time is:
Minimum exposure time = 1/ focal length
In my case that would be 1/600 but depending on the light I adjust the exposure time. Especially in low light conditions I increase the exposure time step by step. As long as the bird remains sitting long enough, I start with an exposure time of about 1/400. When I know that I have taken a sharp photo, I increase the exposure time to 1/200. This way I gain 2 stops of light for which I can lower my ISO by 2 stops. From ISO 3200 I now get down to ISO 2000 which results in a significant reduction of noise. If I have a tripod with me, I try to increase the exposure time even more. In order to minimize vibrations, I also use the mirror lock-up function on the tripod. With a tripod you can achieve sharp images with very long exposures of up to about 1/40.
2.3 Autofocus
A camera basically has three different ways of focusing. There is the continuous autofocus, the single autofocus and the manual focus. But setting the focus manually is way too slow and inaccurate for photographing birds and other animals. I can therefore only recommend the use of the autofocus. But what is the difference between continuous focus (for Nikon AF-C) and single focus (AF-S)?
With continuous AF, the AF-C, the focus is always adjusted as long as the shutter release is pressed halfway down. Single AF adjusts the focus only once. Only when the shutter release is pressed halfway down again, does the camera focus again.
The two autofocus modes can be further divided into single mode, 3D tracking, dynamic mode, group AF and auto. I myself only use two of these settings frequently. Those are AF-C in single mode and the AF-C in group mode. Why I never use the AF-S has the following reason: There is actually a setting that can combine AF-S and AF-C.
Back-Button Focus
In bird photography, a problem arises when using the autofocus. If the bird sits on a branch, I can focus with the AF-C. But when I want to adjust my composition, the focus jumps to the background. I can move the focus point, but this is time-consuming and takes a lot of time. When I use the AF-S, this does not happen to me. But if the bird flies away, I have no chance to photograph it in focus.
The solution of this dilemma is called Back-Button focus. With this method you configure the camera so that the activation of the autofocus is not coupled with the shutter release. Most cameras have a button (AF-ON button) near your thumb. This makes the single autofocus redundant. If I want to focus once, I press the AF-ON button just once. If I want to use continuous focus, I press the button continuously. The AF-ON button can be activated via the menu. However, this is done slightly differently depending on the camera model and brand. I have linked a good tutorial for you here.
The Back-button-Focusing takes some getting used to. But once you get the hang of it, you can shoot birds much more efficiently.
Single-mode vs. Group AF
The continuous autofocus can still be divided into different modes. While I exclusively use the single mode for slow moving or stationary birds, I like switching to group AF for flying birds. In single mode I have a single focus point in the viewfinder, which I can move depending on the composition. The single mode helps me to focus on the eye of the bird. Group AF has a larger field of coverage in the viewfinder and focuses on the closest object. Especially with rather fast and hectic birds, the group AF works better for me than the single mode. Although I lose a bit of accuracy, I don't lose the focus completely.
2.4 File formats
Raw formats
Raw formats store all data captured by the camera losslessly. On the computer, I can still edit the raw file in contrast, brightness and colour values without loosing quality. The raw files have different file formats depending on the camera manufacturer. Nikon uses NEF, Canon CR2 and Sony ARW. These file formats cannot be opened by the usual programs. For this you need specially developed photo editors. There are paid programs such as Adobe Lightroom or Luminar 3, but there are also free programs available.
Conventional file formats
I cannot recommend the use of conventional file formats such as JPEG or possibly TIFF. Although these files need fewer storage space, the lossy compression and the limited editing possibilities are for me not worth the smaller file size.
2.5 White balance
If you save the photos in the raw format, you don't have to worry about the white balance. It can always be left on automatic and if the camera chooses the wrong white balance, it can still be corrected on the computer.
3. Interesting compositions
Perspective
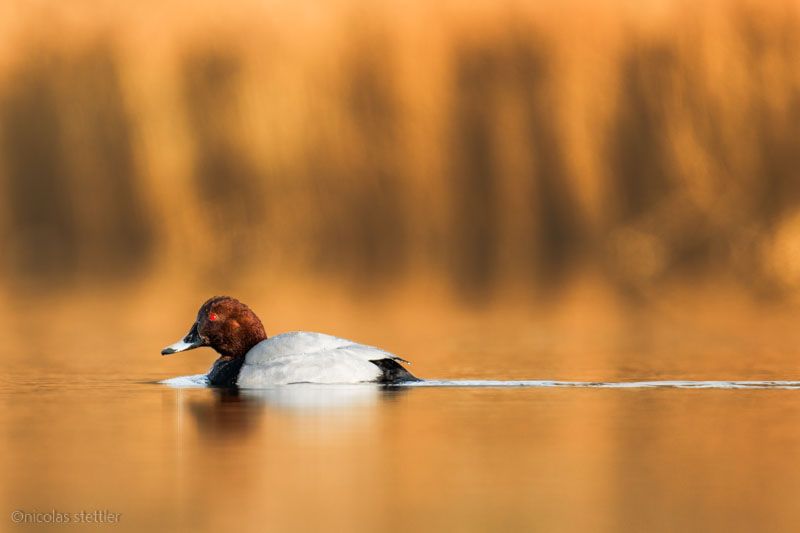
In order for photos of birds to appear as natural as possible, you should make sure to photograph the birds from their eye level. This has the side effect of blurring out the fore- and background. This puts the bird even more into focus. I have already written an article about perspective. It is about the influence of a low perspective on photos of water birds.
Rule of thirds
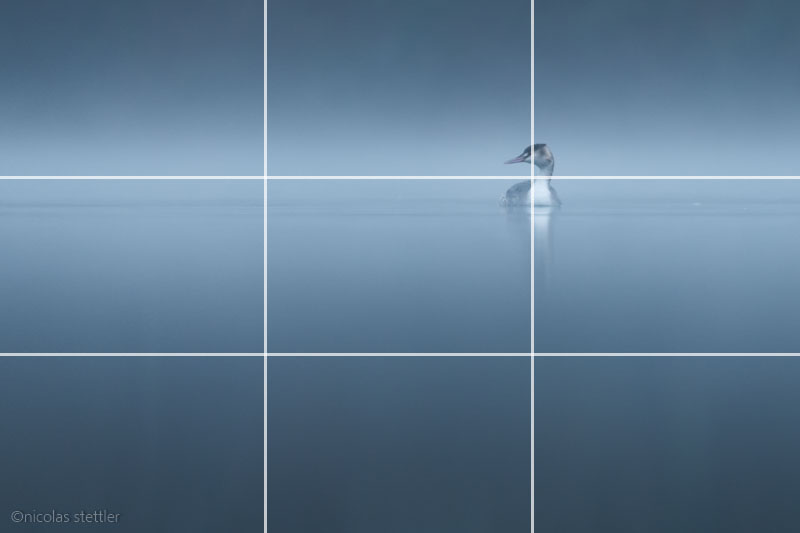
There are different approaches to creating interesting compositions. Probably the best known is the rule of thirds. The photo is divided into three parts along the short and the long side. Objects of interest should be put on the intersections. For example, I positioned the object of interest, here a great crested grebe, at the top right intersections. I left enough space for the water bird to 'swim into' the picture. If I would position the great crested grebe at the left edge of the picture, he would swim out of the picture. In rare cases this composition can also work. But in most cases I leave more space in the direction the bird is looking or moving.
Portrait
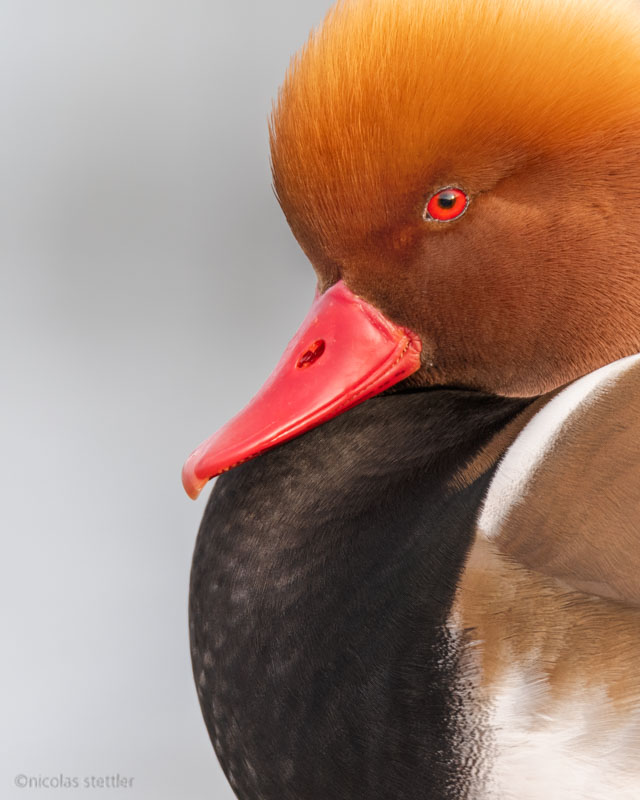
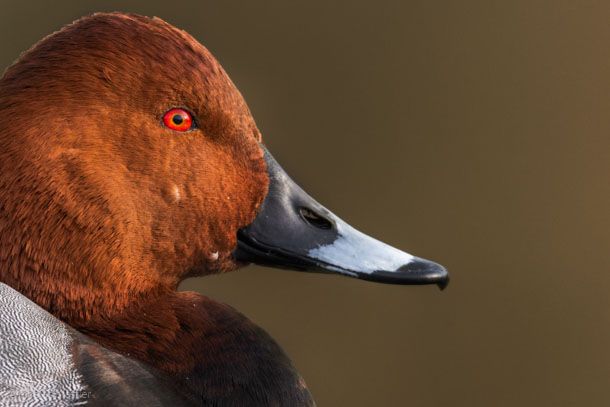
Similar to the usual portrait photography you can also portray birds. However, it is much more difficult to get close to the bird in order to get a full format picture of it, let alone to take a picture of only its head. If you succeed in this, you can create very interesting images. But to get so close to a bird, you need the right individual, a lot of patience and luck. In rare cases you don't even need a lens with a long focal length.
Small in frame
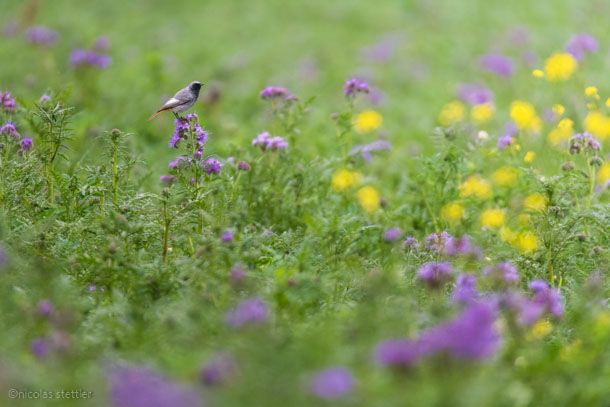
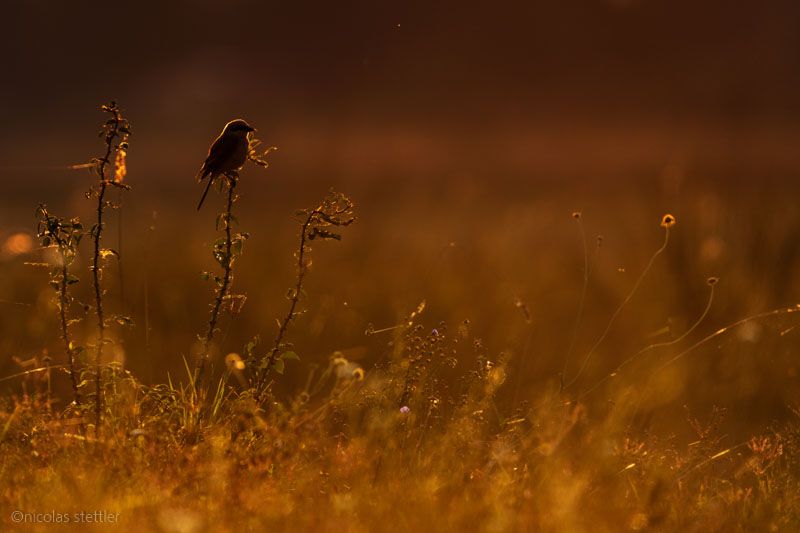
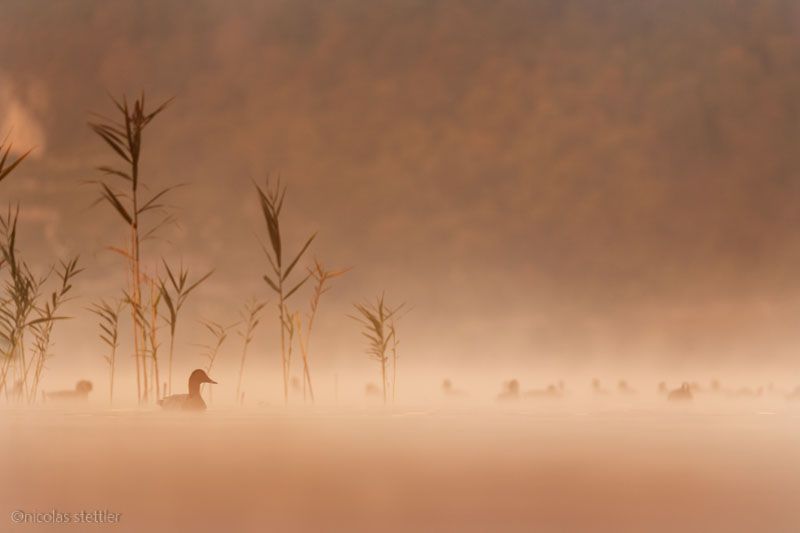
Portraits are always very impressive, but birds that do not fill the whole frame can also be very interesting. These photos are often much more difficult to realize than a portrait. Pictures in which the bird is only shown in small size, live from interesting backgrounds, beautiful light or special weather situations like storm or low-hanging fog. For such a picture to work, many of these factors must come together. If the light and the background are right, pictures with a lot of landscape can create strong atmospheres. These pictures are also much more suitable than portraits for printing and hanging up.
4. How to get a clean background
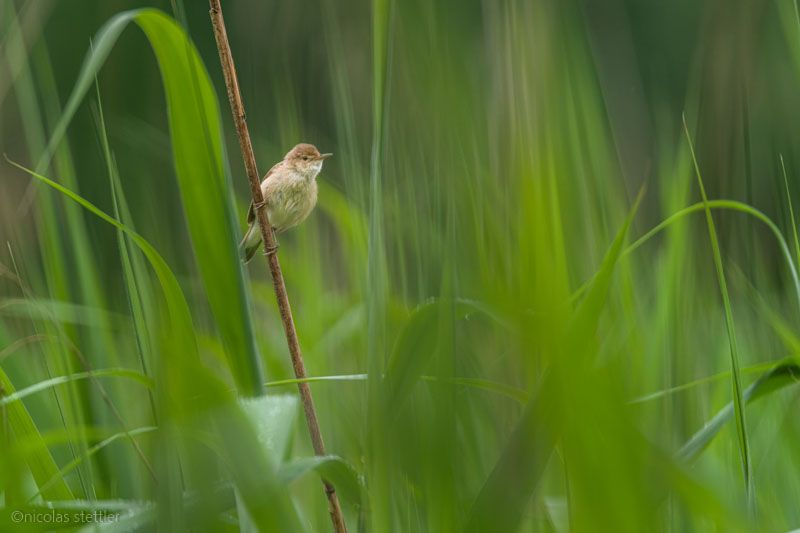
In most cases, the background should not distract from the actual subject which is the bird. To achieve this, I try to make the background as blurred out as possible. The less structures there are in the background, the more the viewer's focus is directed to the bird. Because the focus is completely on the bird when the background is blurred, the bird appears a tad larger. There are certain ways to achieve a clean background:
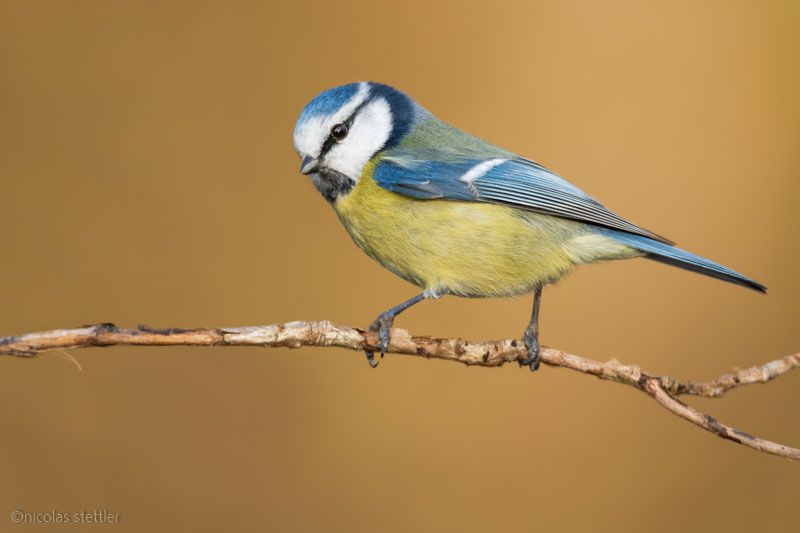
- The closer you get to the bird, the stronger the bokeh and therefore the blurrier the background becomes.
- Create distance between the bird and the background. Often a few steps are enough to have not a nearby bush in the background, but a faraway tree.
- Open the aperture to reduce the depth of field.
5. The importance of the right light
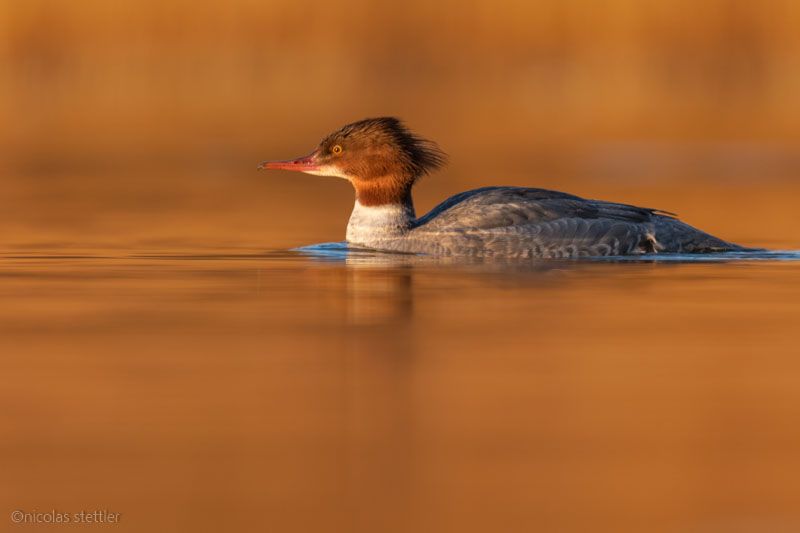
Golden light
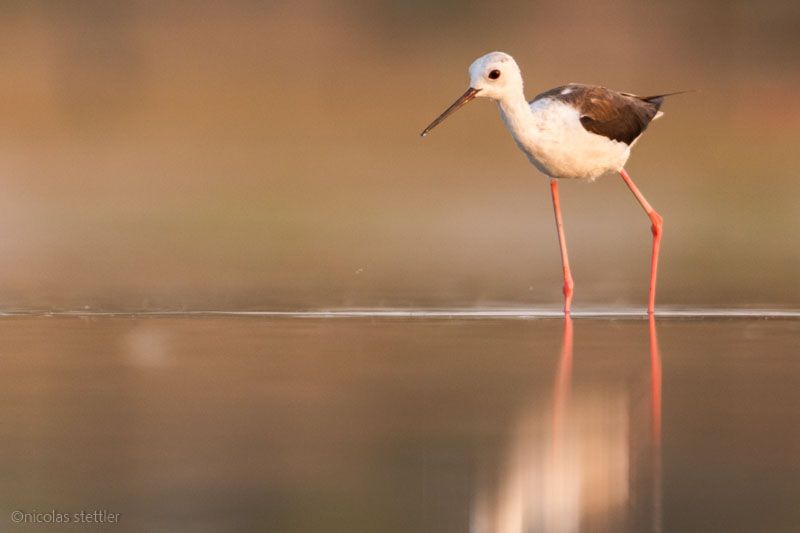
When the sun is very low in the sky, the landscape is illuminated in a golden tone. Especially rather less colourful birds benefit a lot from the golden light. Besides the beautiful tones in the golden light, the light also becomes softer. The differences between light and shadow are weaker and are not as noticeable.
Cloudy
On a cloudy day there is a little less light available, but the 2-3 stops of light are compensated by the soft light. The clouds act like a big soft box and erase any shadows. On a cloudless day the light becomes too harsh just a few hours after sunrise. On a cloudy day it stays good all day long. In addition, it is possible to take pictures in all directions as there is no backlight.
Backlight
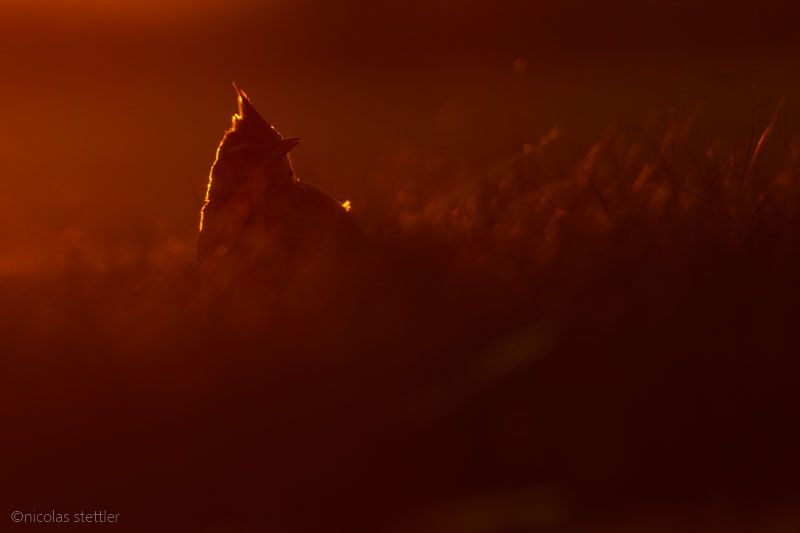
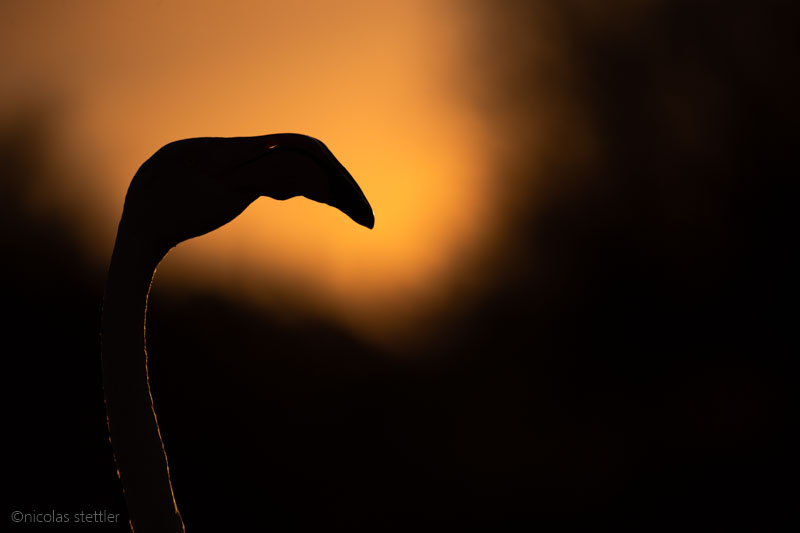
When the sun is low on the horizon, the contours of the bird and its surroundings light up in backlight. The illuminated contours can give a photo a very special atmosphere.
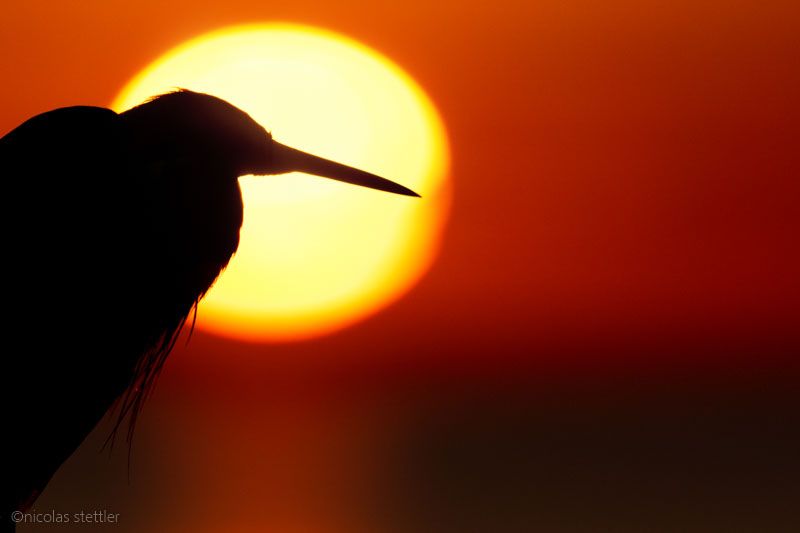
Backlighting can also be used to capture the silhouette of a bird. If the sun is covered by a thin layer of fog, the bird can also be photographed in front of the sun. But without the layer of fog, the sun is usually too bright and burns out even at a fast shutter speed. You should also never use the optical viewfinder. With a strong telephoto lens this can be very dangerous for the eyes!
6. Where to photograph birds
Whether in a nature reserve, in the forest or in the middle of the city: birds can be found everywhere. In the city, birds are used to being close to people. Some species even see us as an indirect food source. Instead of being shy, these birds show interest and they hope for food. But especially with water birds you should not feed them. With songbirds the whole thing is a little less problematic. Even without feeding, you can get very close to the birds and photograph them at close range.
To start with bird photography, I can recommend starting with more tame birds. Once you’ve mastered your camera and technique, you can try more difficult birds.
7. Photograph birds in flight or in action
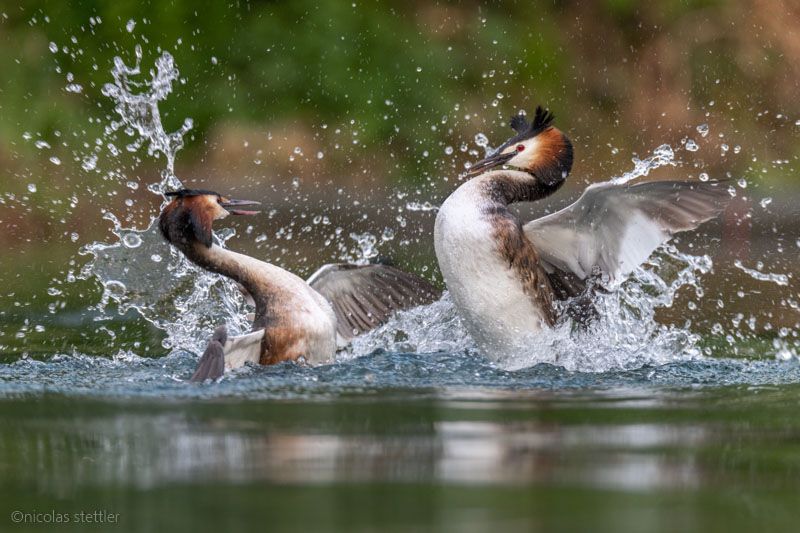
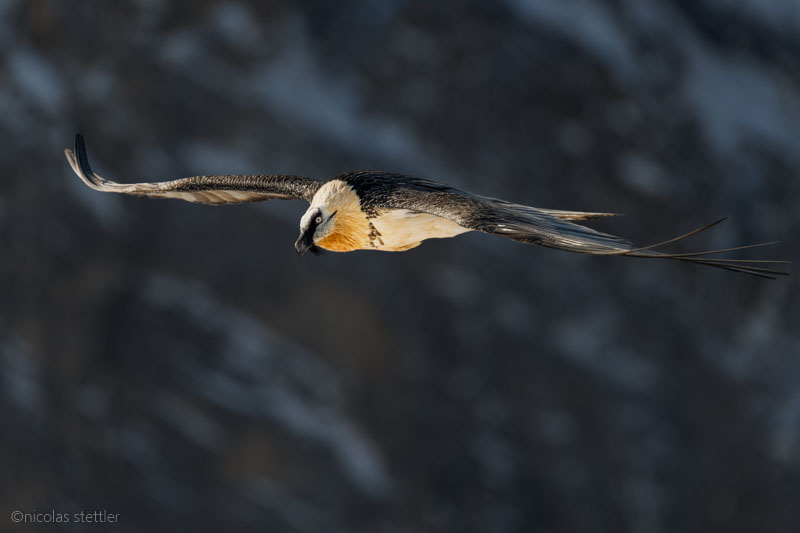
Photographing birds in flight is one of the most difficult things in bird photography. Especially with small birds the autofocus has problems to focus and it is difficult to follow them with the viewfinder at all. This is because many species not only fly in a straight line, but suddenly make unpredictable turns. To take good pictures of flying birds, you need a lot of practice and a little bit of luck. Good equipment with a fast autofocus can also be an advantage.
For birds in flight and birds in action I can recommend the following settings:
To freeze the action, use a fast shutter speed. Depending on the light conditions I choose shutter speeds between 1/1250 and 1/2000. To work with maximum light, keep the aperture as small as possible. The ISO should be controlled manually or by ISO automatic according to the lighting conditions.
8. With patience to success
Sometimes there are days when you don't take a single picture. Because even with all the preparation, sometimes you just simply have no luck. But at some point, it will work out. Often times not when you expect it and not as you imagined it. But for me this is exactly what bird photography is all about. If I came home every day with the picture I had imagined, I would have no subjects after half a year. Like that I still have something to shoot and to improve: the light a little bit better, the fog a little stronger or the bird a little closer. There is always something that I do not like 100%.
9. Knowledge is key
Instead of just going out and photographing everything that flies in front of your lens, I recommend that you concentrate on a few species or species groups. Over time you will learn certain behavioural patterns and you can use this knowledge when taking pictures.
Before I photograph a bird, I try to acquire as much knowledge of the species as possible. This allows me to find out at what time I can photograph it, where I can find it and how it behaves.
After I have photographed the bird several times, I start to know how to behave with the bird species. With time, I can also recognise different behaviours, anticipate or interpret them. All this helps me to photograph the bird species.
So first inform yourself about the species! On different internet platforms you will find current news of birds from your region and from all over the world. eBird is an international platform and has the advantage that it covers practically all continents. Ornitho, however, is limited to Europe. Though, Ornitho is much more frequent and accurate.
If you have found a place where your target species has been observed, you should continue to inform yourself about the species. Does the bird live in flocks? What does it feed on? Is the bird particularly shy?
You should also inform yourself about the area. Is it a nature reserve? Are there certain rules to be observed?
10. Nature has priority
Nature must always have priority. No matter how well the photo has come out, if nature is severely affected or a bird is even put in a life-threatening situation, the image loses all value! During the breeding season and in winter birds are particularly vulnerable to disturbance. Disturbances can lead to a bird giving up its clutch of eggs. In winter, food is scarce, and birds must be economical with their energy budget.
Nature photography serves to show the beauty of nature to other people. What is the point of nature photography if it destroys nature? Of course, it is not always possible to avoid disturbing the birds completely. However, every nature photographer is obliged to treat nature as respectfully as possible and to prioritise the intactness of nature to a good photograph.
You might also find interesting:
Eye to eye with the bearded vulture
A blog article about the bearded vulture. How successful I was and what other birds I managed to get in front of the lens.
Langeoog – Birdphotography in winter
For a week I travelled to Langeoog, an island in the Wadden Sea. Storm 'Sabine' made photography a challenge for me and the equipment.


